Enemy Detection
Review enemy status
Pairs of items can be confirmed as enemies or non-enemies based on the results of an enemy check. When items are marked as enemies, the pair is added to the enemies table in ExamDeveloper (Manage > Import > Enemies). Items marked as 'not enemies' are stored in the non-enemy database ↓.
Review enemies
Item pairs can be marked as enemies when reviewing the results of an enemy detection check, or by importing them via uploading a spreadsheet  . All current enemy pairs are stored in an enemies database in ExamDeveloper.
 If you know specific item IDs, skip to step 5.
- In ExamDeveloper, go to Manage > Import > Enemies.
- The table on this page displays all existing enemy pairs in two columns: a Question ID and its Enemy Question ID.
- Copy the pairs of item IDs that you want to update.
- Go back to the Enemy detection page. (You can also click the More menu in the upper-right corner of ExamDeveloper and select Enemy detection.)
- Paste the item IDs in the Enter item IDs field, separating each ID with a comma and/or a single space.
- Turn on
 Include items marked as enemies.
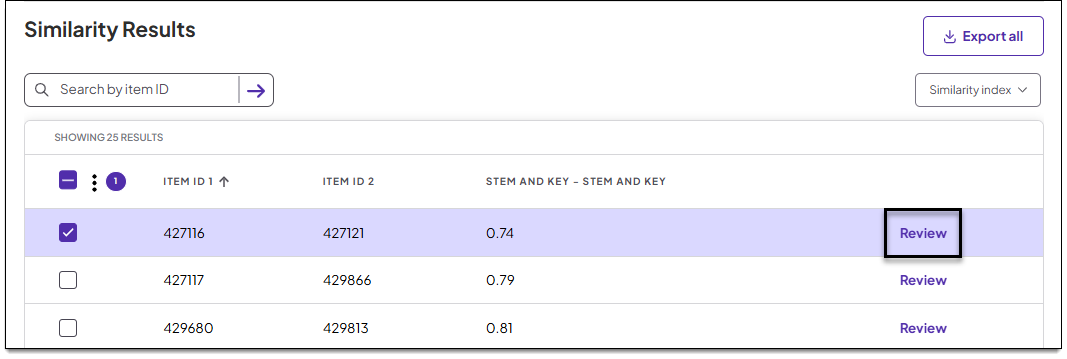
- The item pair(s) should be returned in the results. Select the desired pair(s) and click Review.
- A modal displays the item pair side by side for comparison. Click No at the bottom of this window to mark the items as 'not enemies'.
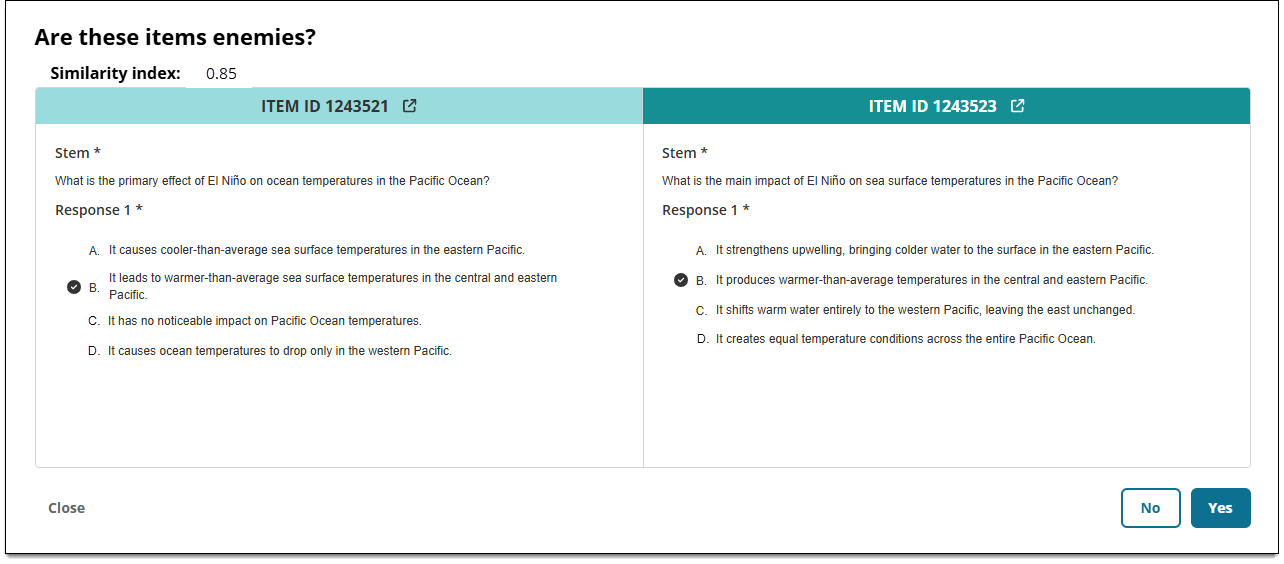
- The item pair is now marked as 'not enemies' and stored in the Non-enemy database described below.
Review non-enemies
|
|
 Item pairs are automatically removed from the non-enemy database if a new revision of either item is created.
Item pairs can be marked as 'not enemies' when reviewing the results of an enemy detection check. Non-enemy pairs are stored in the non-enemy database. This database provides a centralized record of all item pairs that have been identified as 'not enemies' for better tracking and management of item relationships that do not conflict with one another.
If you determine that a non-enemy pair should be marked as enemies, you can update the status by re-reviewing the item pair. Or, if you determine that an item pair is neither enemies nor non-enemies, you can remove the 'non-enemy' status.
Review non-enemy pairs
Review a pair of items to potentially mark them as enemies instead of non-enemies.
- On the Enemy detection page, click the Non-enemy database tab.
- To filter the non-enemies table, input item IDs in the search bar and click the search arrow →.
- Select a single item pair to review and click Review at the end of the row.
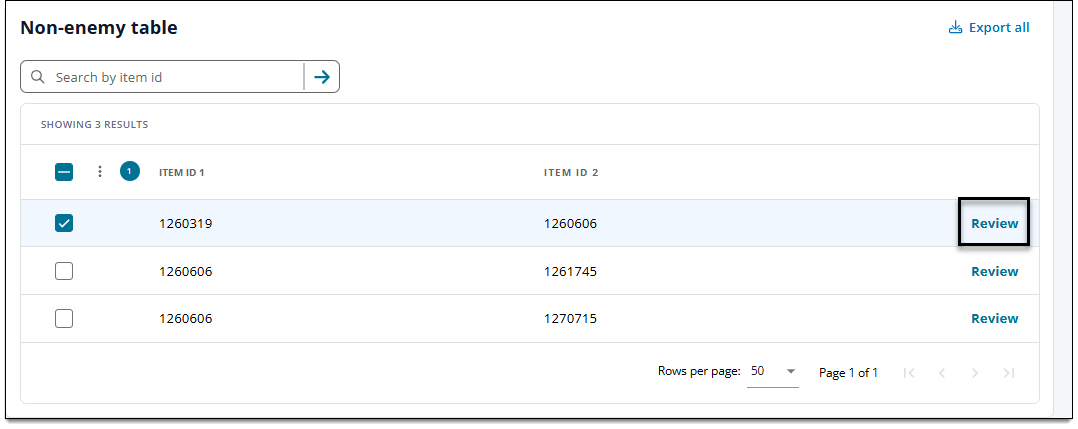
- A modal displays the item pair side by side for comparison.
- Choose one of the following actions:
- Click Yes at the bottom of the modal if the items should be marked as enemies.
- Click No or close the modal to keep the item pair in the non-enemy database.
Remove non-enemy status
Remove 'non-enemy' status from an item pair. This allows the pair to potentially be flagged as enemies in new enemy detection checks. (As a reminder, item pairs are automatically removed from the non-enemy database if a new revision of either item is created.)
- On the Enemy detection page, click the Non-enemy database tab.
- To filter the non-enemies table, input item IDs in the search bar and click the search arrow →.
- To remove non-enemy status, select one or more pairs, click the
 and select Remove as non-enemies. (You can also select the top left checkbox to select all pairs in the non-enemy database.)
Export the non-enemies database
- In the upper-right corner of the Non-enemy table area, click Export all.
- A .xlsx file is downloaded from your browser and found in your local Downloads folder.
- The spreadsheet will display all of the item ID pairs that are included in the non-enemy database.
Pearson Proprietary and Confidential